DIY Escort Card Tree

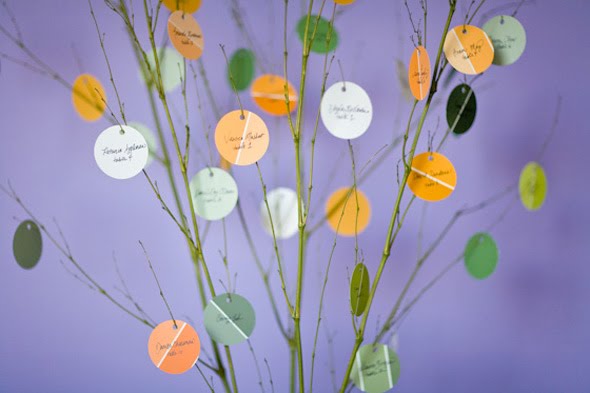
It’s been a little while since our last DIY post, and I know you are all itching for a new project. Well, the wait is over! A client of mine brought this fabulous idea to us for a tree of colorful round escort cards. Using colored paper and paint chips allows you to develop your own color palette, and the results are really charming and will be unique to you and your wedding.
Here’s what we used for this project:
- A package of multicolored heavy weight construction paper (about $10 for 87 sheets of 5×7)
- A bunch of paint chips from Home Depot (or maybe it was Lowe’s, but it definitely was not the mom and pop paint shop down the street who we love and support)
- Paper Shapers Nesting Punch, we used a round one but there are lots of different shapes out there ($15ish)
- An endlessly useful fine point Sharpie, of course, you can use any pen you like.
- Some decorative branches (prices vary depending on what type of tree, but start around $8 a bunch)
- A small hole punch.
- A ribbon or string to hang the place cards from the branches, although we opted to put them on the tree without either.


Once you have your paper and/or paint chips, just start punching out shapes.

Also, at this point you should punch small holes at the tops of your circles (don’t wait until you’ve done the handwriting, lesson learned).

Hopefully, you have someone whose handwriting you are fond of to help write the guest names and table numbers on your circles.

Arrange your branches in a vase, basket, bottle… however you wish. Then begin hanging your escort cards. As I mentioned before, we just put the branches right through the little holes, but you can use string, ribbon or whatever you like. Our choice gave a more austere look to the final tree, but ribbons or twine might make it look more romantic, nostalgic, pretty…

posted by Corrina Kulhanek at
8:39 AM
![]()


<< Home